 |
| Photo by Bruce Medic Photo at BruceMedicPhoto.com "like" my Facebook Page - Manabizzle Creations for more tutorials and updates!
I made this fun cat mask for a Steampunk tea party at the Geek Bar in Chicago. Here's a tutorial for making your own!
You will need:
Craftfoam
Hot glue
Gesso
Acrylic paint
Acrylic sealant
Pattern - I used the cat mask pattern from Chris Huebert
A LOT of patience
Optional: worbla/thermalpastics
Let's get started:

print out the pattern
you can absolutely make your own if you are good with pattern drafting!
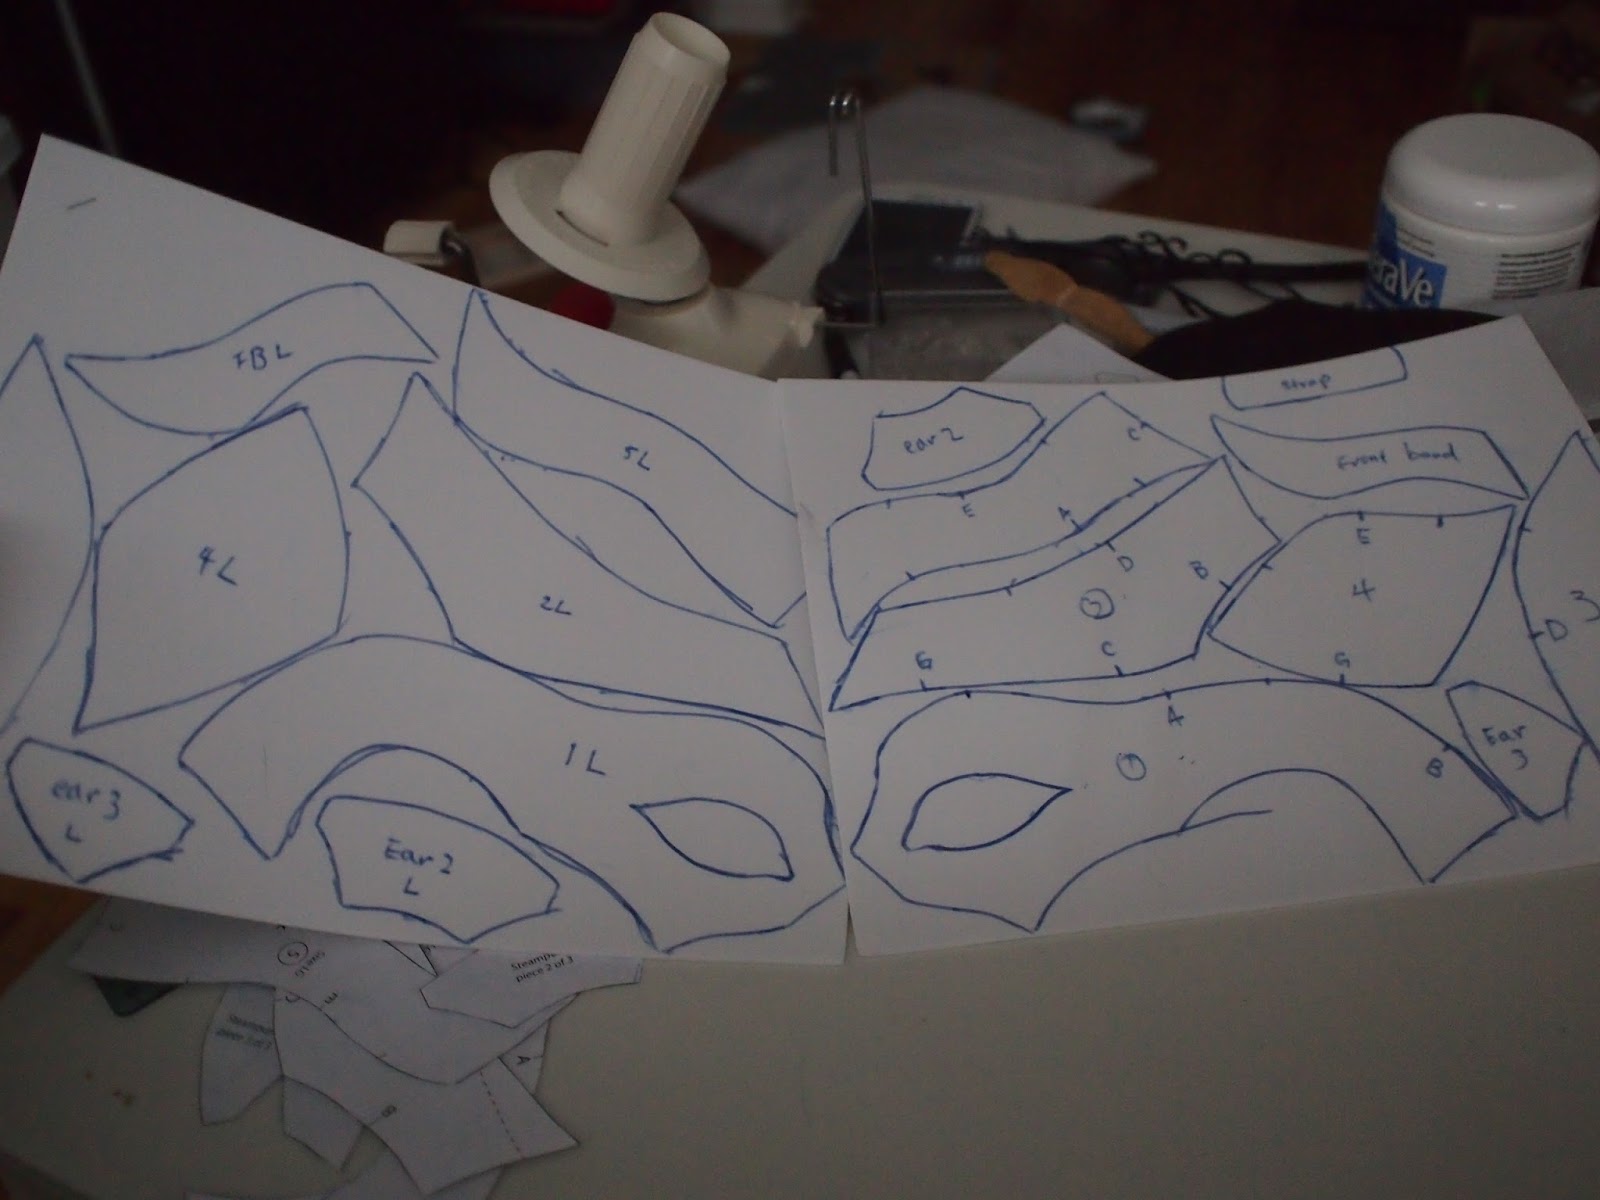
Trace it onto craft foam, twice.

Cut out the foam (cat helper optional)

Optional: trace the pattern onto worbla and cut out the pieces

Optional: Heat and wrap the warbla around the foam.

Match and glue the pieces together
Worbla sticks to itself when heated, you can use contact cement or hotglue if you are only using foam

Start shaping the mask to head.
The eye hole were a bit small for me, so I enlarged it a bit.

All the mask pieces together.
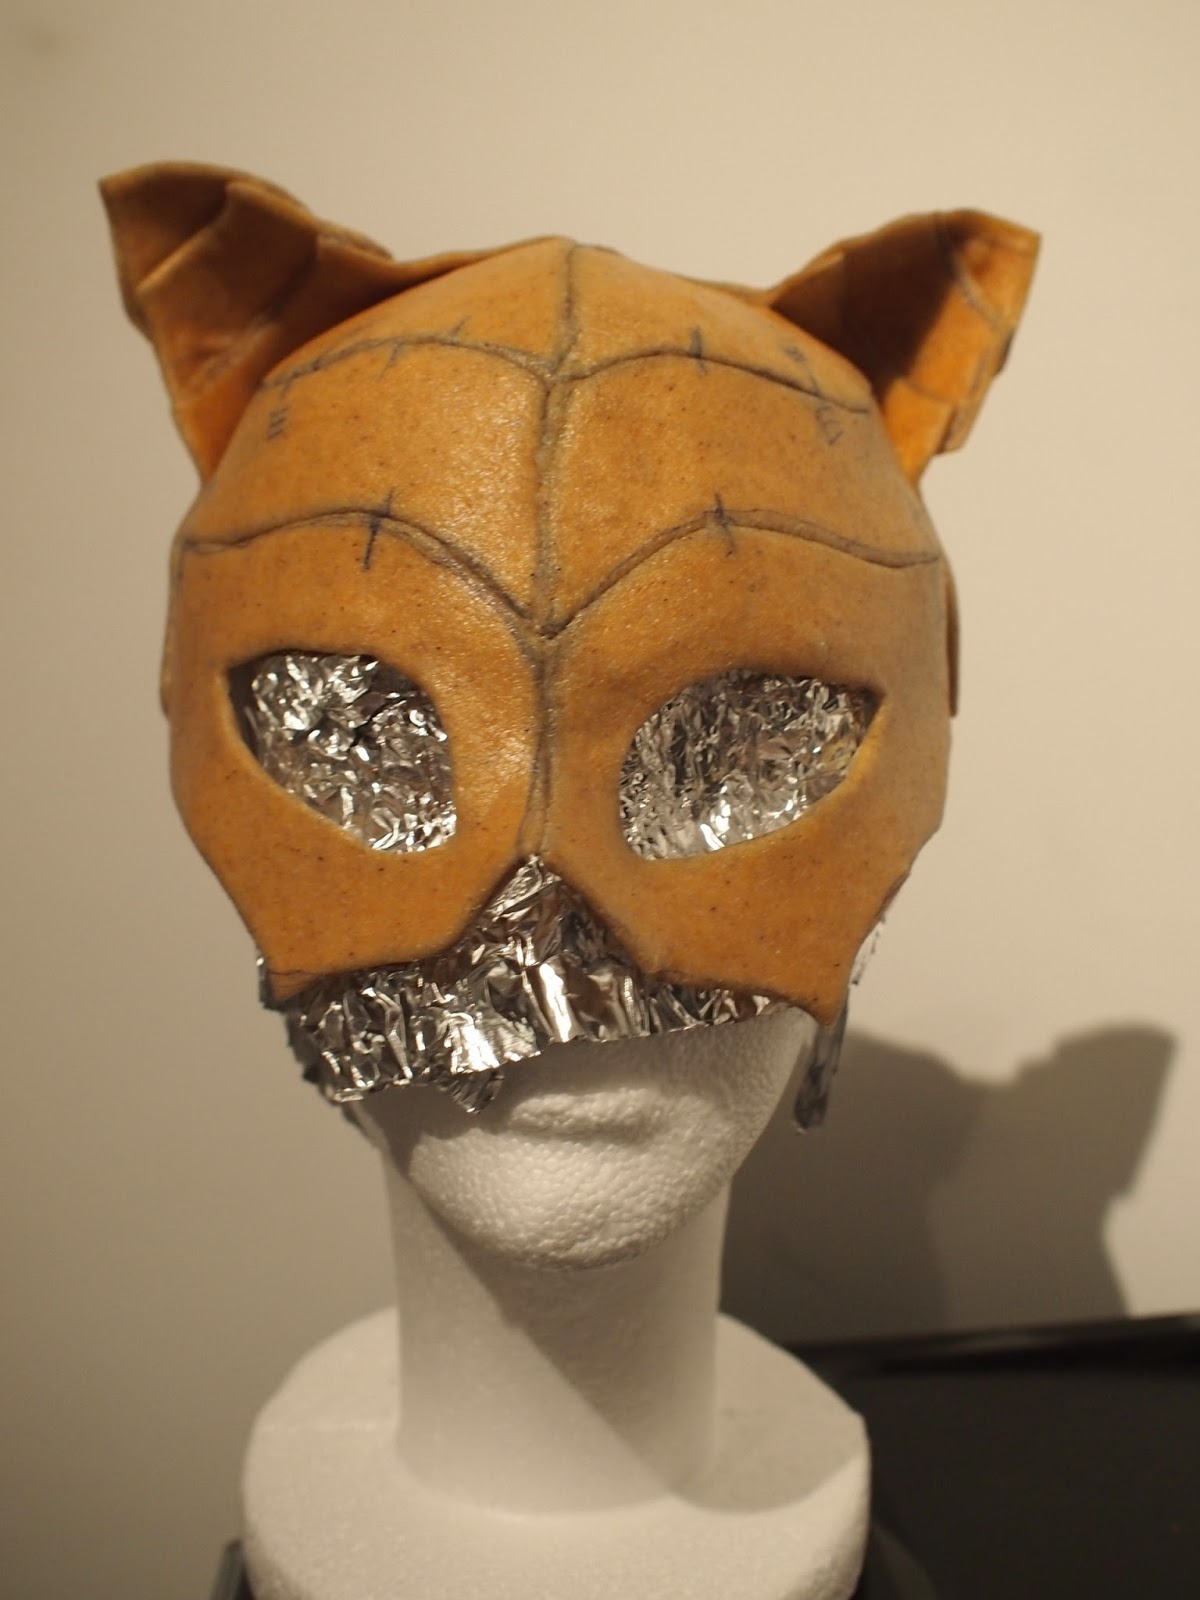
Add ears.

Embellish as you like.
I used a mod podge hot glue mold for the cogs but you can also cut them out of cardboard.
The lens was from a pair of reading glasses from the dollar store.

Prime with gesso. Lens covered in painter's tape.

Prime again with black acrylic paint then start on first layer with a dry brush.
I used bronze for the main colour and gold for the embellishments.

Seal it with a clear acrylic sealant (I used satin) and we are done!
 |
Showing posts with label steampunk. Show all posts
Showing posts with label steampunk. Show all posts
Sunday, December 21, 2014
Steampunk Cat Mask Tutorial
Wednesday, December 17, 2014
Steampunk Book Box

"like" my Facebook Page for more tutorials and progress updates!
Michaels always have these little book box things on sale so I grabbed one for $2 and made it into something I can carry around as a clutch.
This project is pretty simple. All the work can be done in less than an hour but it does take a day for it to dry. All you need is the book box, hot glue, paint, and an acrylic sealant.
Let's get started:

Cover the sides (fake page prints) with painter's tape.

Draw a design that you want on it and trace it with hotglue.
I used a modge podge hotglue mold for the gear but you can also make them out of cardboard.

Prime with gesso and black paint

Paint with a very dry blush.

I used bronze for the base colour and antique gold for the details.

I like to add a thin black line around the details to make them pop.

Spray with an acrylic sealant and you are done!
I used a satin finish since I didn't want it to look too glossy.

Subscribe to:
Posts (Atom)