Showing posts with label worbla. Show all posts

Sunday, November 1, 2015

Princess Peach Crown


Princess Peach Crown Tutorial!

Visit my facebook page at Manabizzle Creations for more tutorials/pictures!
Materials:
  • Scissors, ruler, pen/marker
  • Craft foam
  • Worbla (wonderflex would work too)
  • Heat gun
  • Acrylic paint (black, white, and gold)
  • Hot glue gun and glue
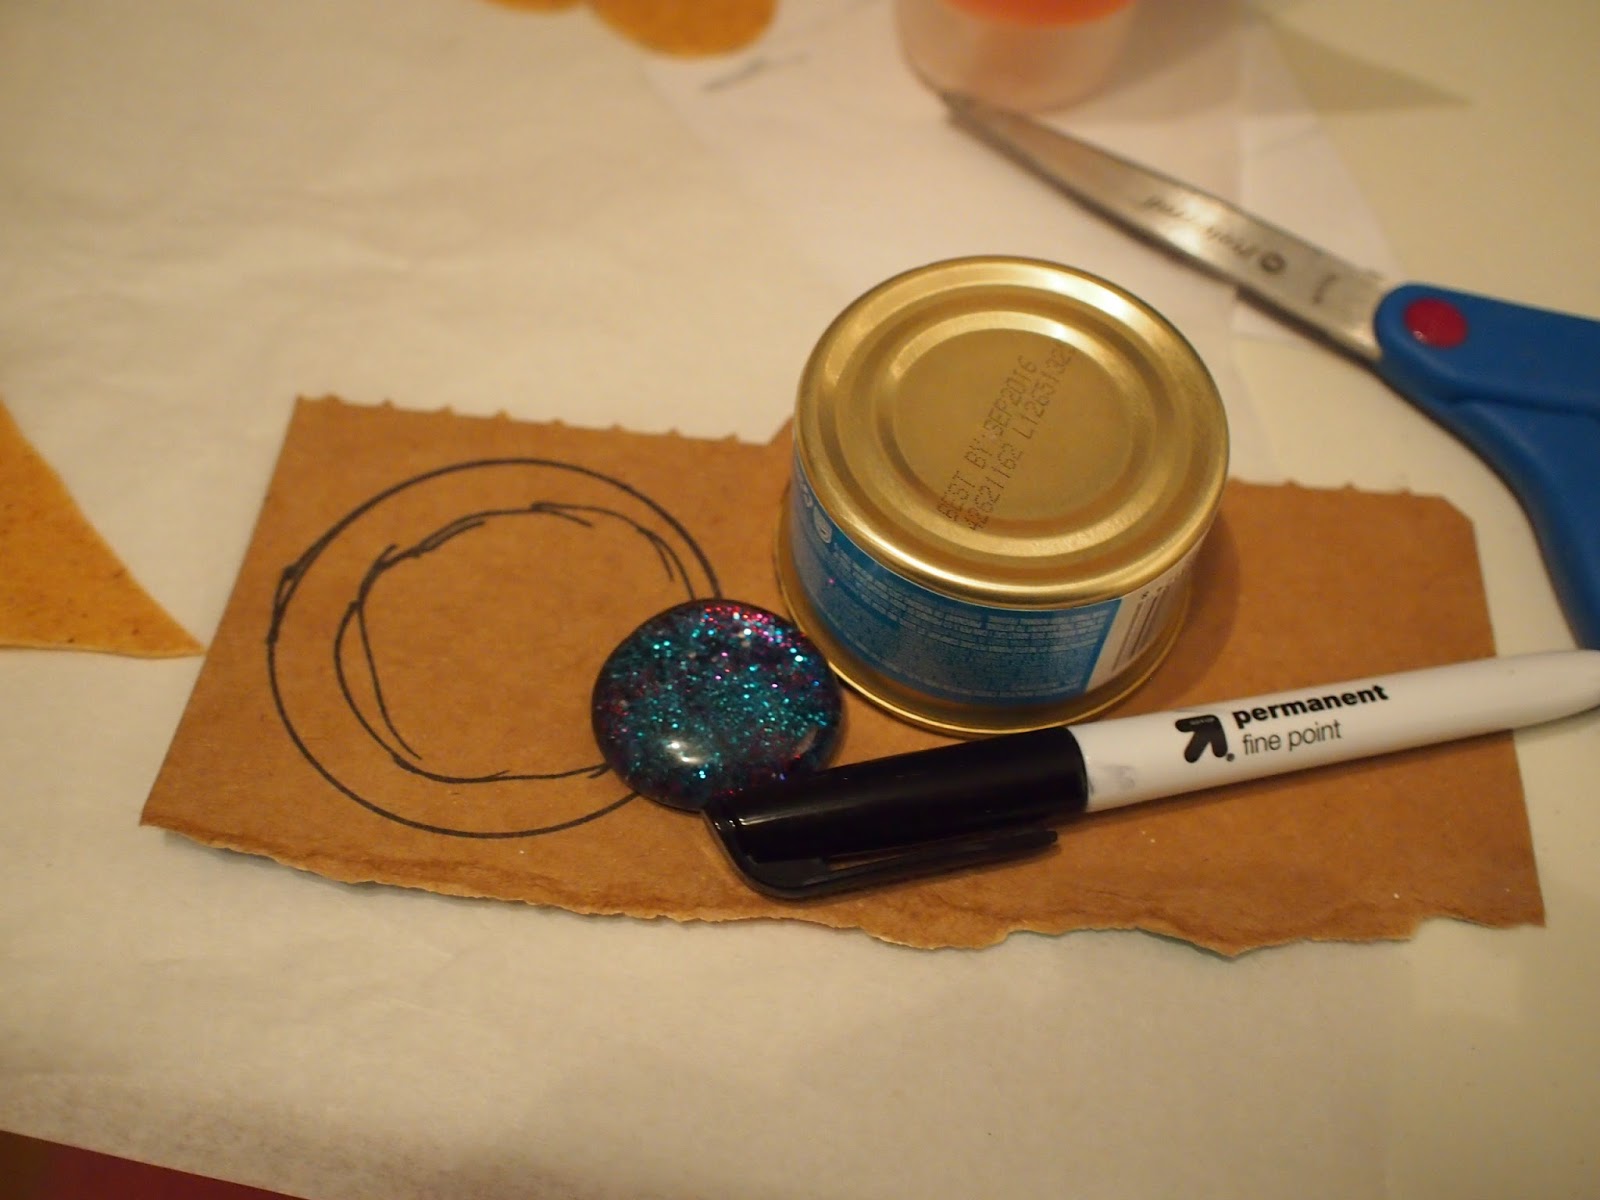
  • 60mm round acrylic gems (2 red and 2 blue)


Let's get started!

1. Gather materials

2. Draft a rough crown pattern on the foam and cut it out. I cut it into 4 pieces so it'll be easier to heat/reshape for the worbla. You can do it all in once piece if you are using a different material.

3. Roughly cut out pieces of worbla to cover the crown pieces.

4. Use a heat gun to heat up the worbla pieces and seal the foam between the worbla.

5. Connect the worbla-covered pieces together to shape a basic crown.

6. Roughly draw design details onto the basic crown.

7. Add the details with strips of worbla.

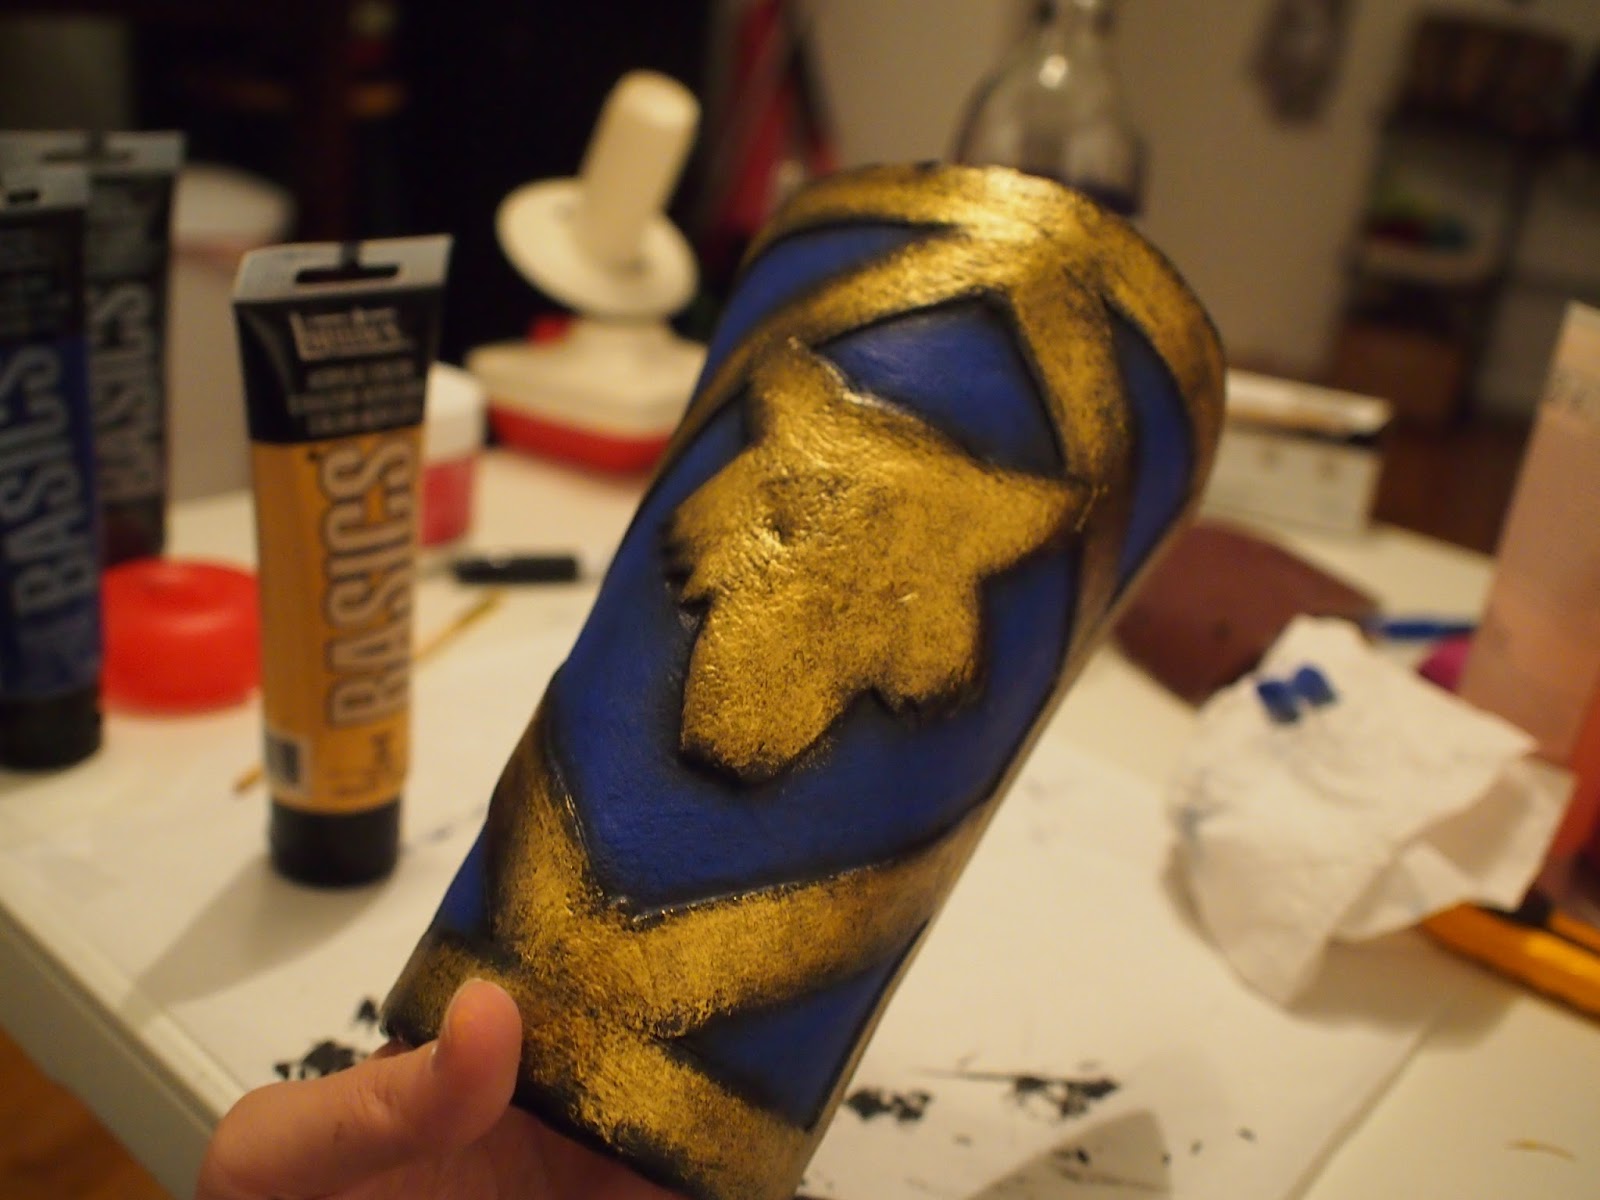
8. Spray paint the crown with a black base. *I usually prime the worbla with gesso, I ran out of time and did not do so for this piece, so the texture of the crown came out a little more rough.

9. Dab on a layer of gold paint with a dry brush and a tiny dab of water.

10. Trace the shadows with black paint, and high light with white paint.

11. Hot glue on the gems and we are done!

I put two little hooks on the bottom of the crown so it can be attached to hair/wigs with pins.


Bonus: Princes Kira!


Thursday, November 20, 2014

Cat Pendant - More Worbla Fun!


Made this for my best friend (and my favourite crazy cat lady). Here are some progress pics!
For more frequent progress updates visit my facebook page!


I painted a pretty rock and drew a basic pattern on worbla. (The cat's my signature).


Melt the pieces together to make the back.


Melt a strip around the pretty rock.


Wrapped a piece of worbla around a crochet hook and melt onto the gem.


Heat up the back and attach to the back of the gem.


Added ears to the front.


Primed with gesso.


Primed with black paint.


Painted the worbla part and sealed with an acrylic sealant.


Add ribbons and we are done!


Wednesday, November 19, 2014

Doctor Fate's Amulet of Anubis (prototype)


 I am planning a Doctor Fate costume for my first armor project. This is a prototype of the Amulet of Anubis to test out the size, design, techniques, etc.

For more tutorials and progress photos, visit my facebook page!

Here are the progress pictures:

Drew a rough design on my iPad.


Painted a pretty rock, and drew a rough pattern on a piece of cardboard with a can of cat food.
The cardboard was from the box the cat food had arrived in!

Trace pattern onto the worbla twice and cut out the patterns.

Heat up worbla and sandwich the cardboad in between them and trip excess.

Melted some leftover worbla together.

Rolled it around the pretty rock.

Flattened out the worbla wad onto the circular piece from before and added some details

Heated up a small square of worbla and rolled it around a knitting needle.

Attached the small worbla piece to the top of the amulet.

Covered center with tape and primed with gesso.

Primed with a gold and black acrylic mix since I wanted a shinier look.

First coat of colour.

Traced the edges with black lines.

Added runes and white lines for highlight.
(For those who want to find deeper meaning in life, the runes are Daedric and spell "WALRUS")

Sealed with an acrylic spray paint.

Added a cord (I'll find something more cosmic powery looking in the future) and we are done!


Monday, November 17, 2014

Warhammer 40k Space Wolf Bracers


I actually started on this bracer before making eldritch ones but had to wait for some materials to arrive before I could finish it. In case you are wondering why I am making so many bracers, it is because I just started playing with worbla. Bracers are relatively simple to make and take less material than other pieces of armor if I make a mistake.


As usual, here are some progress shots:

Sketched out a rough design on my iPad, using Paper.
Drew the pattern on a piece of craft foam (the first wolf was too derpy so I had to draw another one).
Cut out the foam and two pieces of worbla that were large enough to cover the foam.


Covered the foam with heated worbla.
It took a couple heating for the details on the wolf to show up.


Curved the entire piece by pacing it on a vodka bottle.

Added details with strips of worbla.


Primed it with many, many, many, many, many layers of gesso.

Primed again with a couple layers of black acrylic paint.

Painted with a rough layer of base colours.

Added some highlights.
Added some "battle scars" and sealed it with an acrylic spray.

Now, for attaching the straps to the back.
Bend some garden wire into little rings (you should take better care of your pliers than I did with mine...poor thing was falling apart with rust).

Attached the rings to the back of bracer with small pieces of heated worbla.
Sew nylon webbing and buckles onto the rings.
And we are done! The straps are adjustable.